Restore is limited to 4 times in 30 days. If you want to restore files and there are more than 3, you need to download your account backup by clicking on “generate download” and manually upload the files via File Manager, otherwise you will hit the limit.
Automatic account restore
First, access cPanel. If you have any problems and don’t know how, contact support.
Then find the Jetbackup5 icon.

Now that we have opened it, we have options to restore the entire account as well as individual parts of the account, depending on what we need.
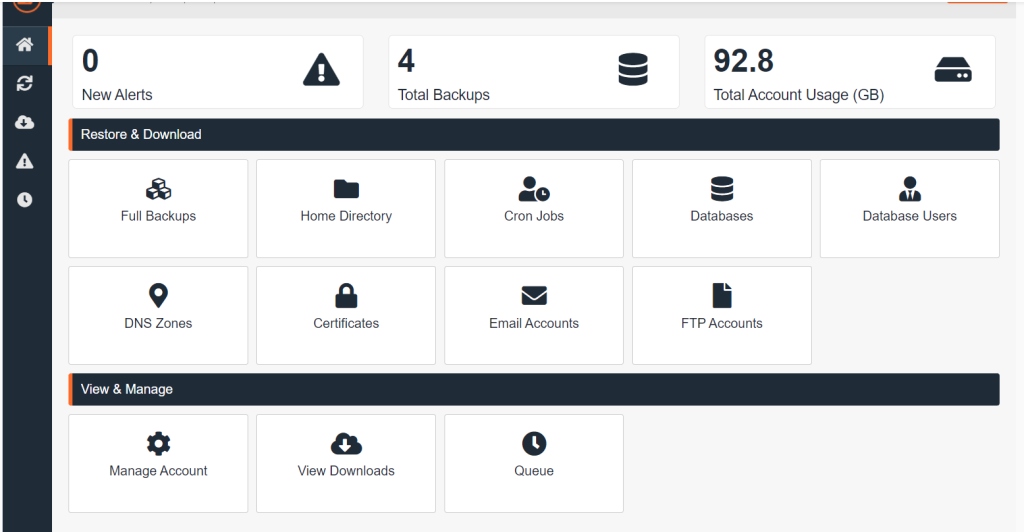
Restore entire account
To restore the entire account, go to Full Backups.
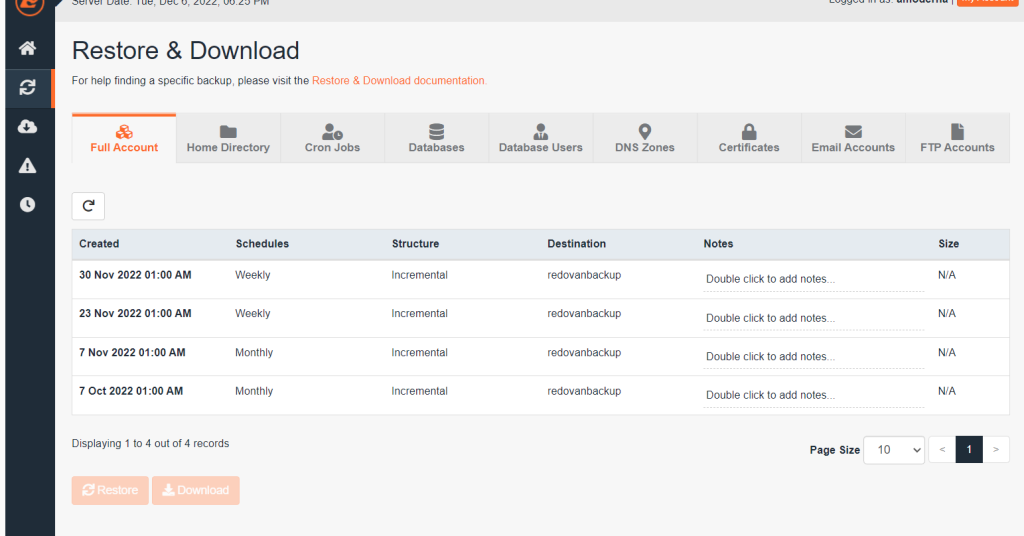
Here we choose the date we want to restore.
It is essential to know that by restoring the entire account, the website, email, and the site itself will be restored.
After selecting the date, click on the Restore button and you will get something similar below.
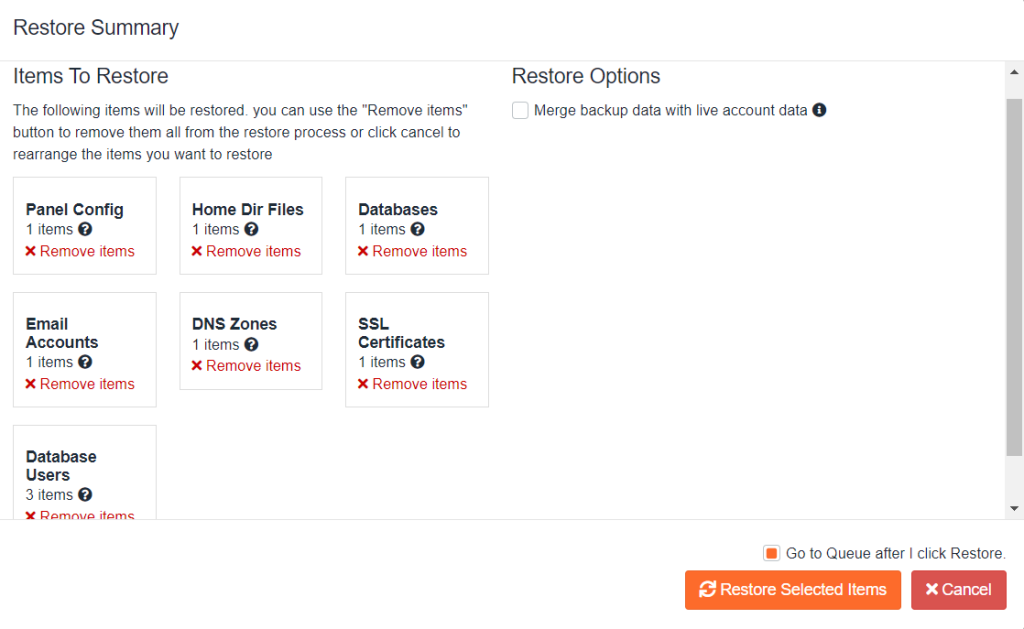
Here it offers us a complete restore of everything possible, and even though we have chosen Full Backup, we can turn off individual items by clicking on Remove Items. This means that if you have, for example, problems with files (viruses or a bad backup or damaged home directory), you can leave only Home Dir Files and delete everything else. The same applies to other options.
Restore Options
The option in the image above gives you only one option “Merge backup data….” which means that it will merge existing files with those from the backup. If you don’t check this option, your account will be completely deleted, recreated, and data from the backup file will be placed. (Do not use this option if you have viruses on your account).
File Restore
When we go to restore files, we go to Home Directory and get a list of available backup dates. Click on the desired date to which we want to return the files, and then click on Change Files Selection. A popup window will open where we can choose the file or folder we want to restore. After selecting it by checking, click on the Restore button.
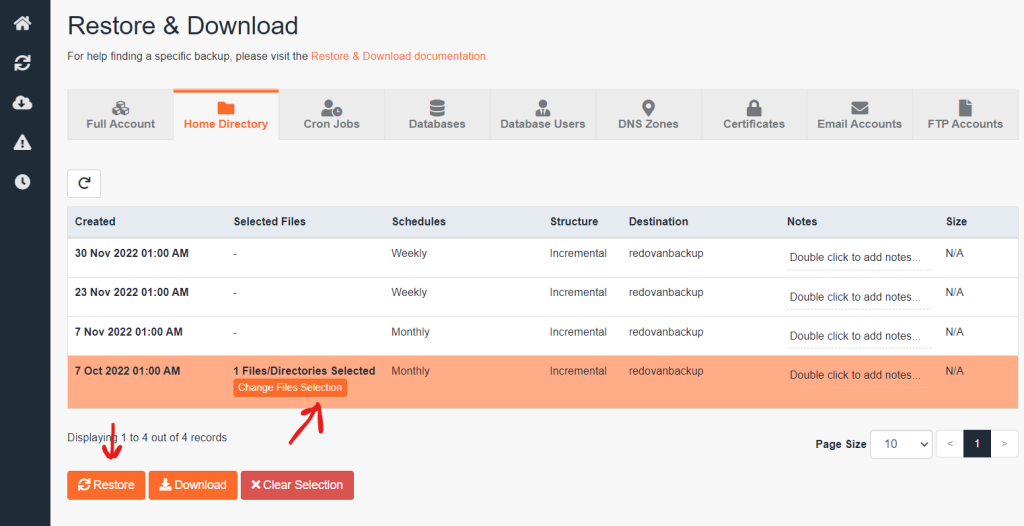
We will be offered again, as in image 3, where we have the restore option and confirm our choice.
Restore Cron/Database/DNS/Email
For restoring cron jobs, database, DNS, or email accounts or accounts, the options are the same. Select the option we want to restore, for example, the database in this case.
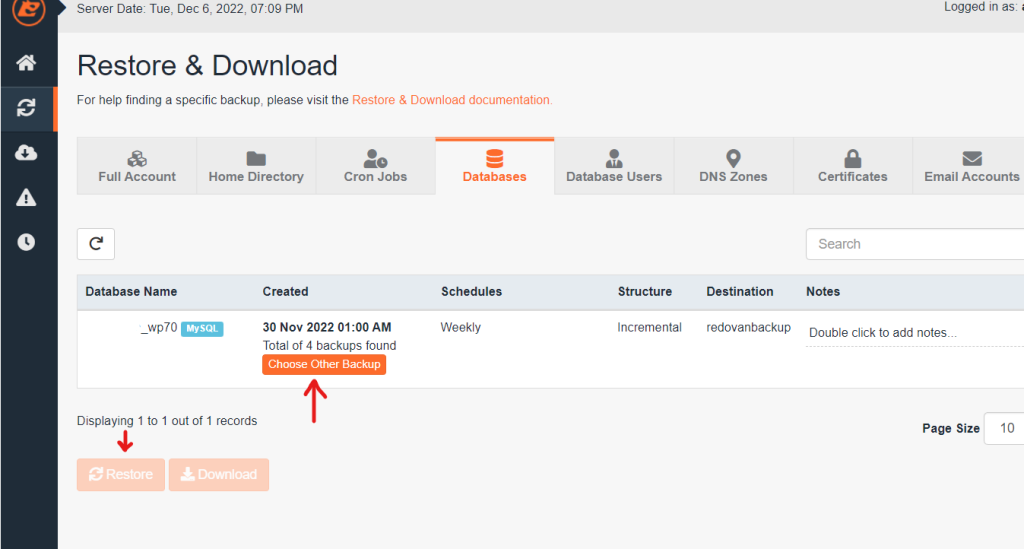
Choose a date by clicking on Choose Other Backup and mark the date we want to restore, then click on the date above the orange button so that the entire row becomes orange, and the Restore option will become available. Clicking on the Restore button will again bring up a popup window like in image 3, where we confirm.
This procedure applies to all options and is completely the same for the others.
How long will the restore take?
The restore depends on the size of the account, the selected option, and the server’s workload. It can take from 10 minutes to a few hours.

In this option, you can track the progress of the restore, and you can refresh and follow the progress. You can also turn off cPanel, and the restore will continue; it is not connected to your computer.
There is no date that I need?
Restore dates are those available to you; outside of those dates, you cannot restore. The only exception is if you have manually made a backup, then you can manually restore it. As for the offer, it is only what you have in the Jetbackup 5 application itself. The daily backup is an additional option that you can purchase, and you have 15 days at the daily level plus 2 monthly and 2 weekly backups that are already included in the price.


