You can download MailBird at this link:
MailBird Email Client (aff url)
MailBird Email Client (without aff)
After installation, a window like the one in the image below will appear.
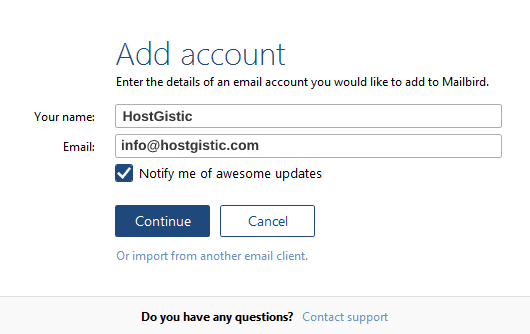
In the first field “Your name,” enter your name if it’s a personal email or the company name if it’s a company email.
In the second field “Email,” enter the email address you previously created in cPanel and click on Continue.
After that, a new window like the one in the image below will appear.
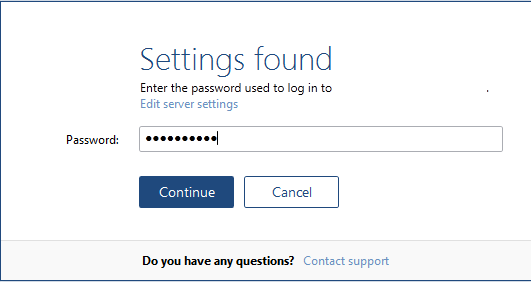
In this step, enter the password you set when creating the email address in cPanel.
After entering it, click on Continue, and you have successfully completed the setup.
There is nothing more you need to do.
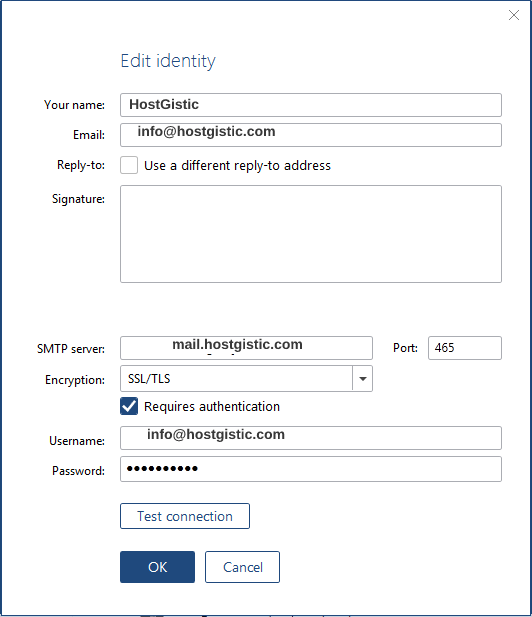
The most common problems are an incorrect password or a typo when entering the email. So, we have provided images below showing the settings for modifying the account if needed. Compare the settings and set them as shown in the picture.
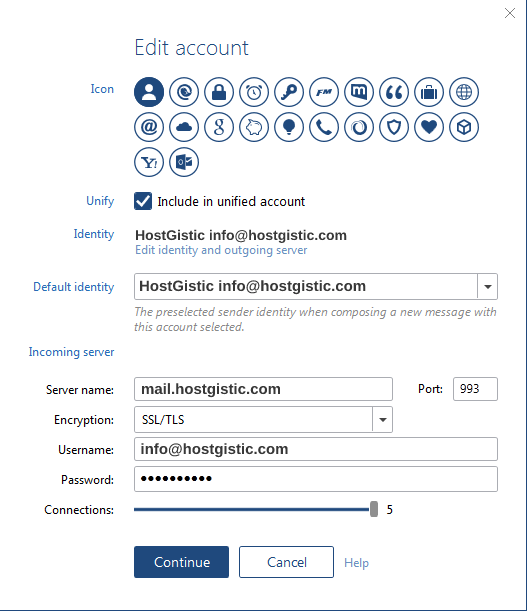
You can access the window below by clicking on “Edit identity and outgoing server” where it says Identity.
That’s it.


