First of all, you need to check if your website has an official email address (something dot your domain dot something: domain.tld). If it’s a WordPress site, check in Settings – General, and the field for the email should have your official email address. If it’s not there, enter it (you should also create it where you have hosting).
Of course, you can also use Gmail or any other free mail provider here, but it’s not very professional and appealing to the eye, is it? So, we won’t even write about them, especially since anyone can have their own email if they have a website.
Next, is your website connected to the mail server via SMTP?
If you’re wondering something like: how do I know? Then the answer is that there’s a 99% chance it’s not connected. This is the main reason why the email goes to spam.
In one of the previous articles, we wrote about how to connect your website to the mail server. SMTP and WordPress
Now that we have an official email address and SMTP properly connected with email and website, the next step is to test if the email will end up in SPAM.
There are many tools, but we’ll highlight one of them: https://www.mail-tester.com/
When you open the site, it appears:

Now you need to send an email to the address that appeared in the white rectangle.
Sending an email is quite simple; you can simulate creating (or purchase) an account and enter the email address that appeared or simply send an email through a mail client or webmail.
When you do that, click on the blue square, and you should see an image like the following:

There’s also a score. As you can see, it’s out of a maximum of 10 points. If it’s lower, don’t panic right away; it doesn’t necessarily mean it’s bad.
First, we’ll go step by step, as you can see, there are several items to check which can cause the email to end up in the spam folder instead of the inbox.
The first item is a simple review of your email; if something is wrong, it will be written, but it doesn’t count towards the score.
The second item, as you can see, is already included for us, and it’s the first check. When we click on it.

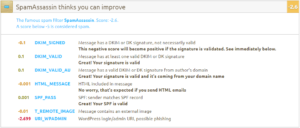
We will also see messages. As you can see, there are ratings and what is negative here. The most dangerous thing here is not having DKIM and SPF (we will write how to add them at the end of the article). We got the lowest rating because the registration data on the website is available, so it says it could be phishing. You shouldn’t worry about this because, as mentioned above, any rating below 5 is considered spam. No matter what you do, this will not fall or be close to 5 if you have DKIM and SPF active and correct.
The third item, what does it tell us?

Here you will most likely have a negative rating, especially where the DMARC test is, which is rarely seen, even though it is set up the same as DKIM and SPF (this will also be at the end of the article).
If the last three items are not good, contact your hosting provider to fix it because it doesn’t depend on you. What you can do are the first three, and that’s it.
As it says, DKIM, SPF, and DMARC are correct and valid. DMARC has become popular lately because Gmail often sends emails to spam without this record.

The fourth step
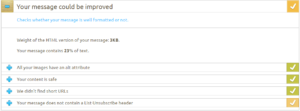
The fourth step is also important because it shows how the server software treats your email. How large your email is, its content, how many images, and how much text it has, whether it’s HTML or not. Whether it contains any broken links or links that lead nowhere. All this affects spam. If everything is fine (from the technical side of the previous step), this is also very important for what kind of email it will be. Because today’s software not only learns on its own, but it also has rules by which it recognizes spam messages.
As you can see here, it doesn’t give a negative rating, but it suggests adding a link in the email header where the user can unsubscribe from the mailing list if they don’t want to receive any more messages. This also additionally prevents your email from ending up in the spam folder.
The fifth step is crucial because even if everything else is fine, if your server is listed here, there’s no salvation.

This MUST be like the image, i.e., it should say that you are not on a blacklist. What does that actually mean?
If you are on at least one list, i.e., your server where you have a website, there is a huge possibility that your emails will not even be forwarded to the client; you won’t even reach the SPAM folder. The systems simply block any emails from servers that are on some list. That’s how it is, and it prevents server abuse.
If it says that you are on a list, that’s the biggest problem, to say the least. You must urgently contact your hosting provider and request that your site be migrated to another server whose IP address is not on the blacklist or do something about it.
The unblocking process can take several days.
How a hosting provider can prevent their server from ending up here is quite simple: by preventing mass email sending on hosting accounts with various limits and software.
The last step is where it says you don’t have bad links, i.e., those that don’t work or similar, and your test is complete.
Now that we have finished all this and you have received a negative rating for DKIM, SPF, or DMARC, in the following text, we will explain how to add them in cPanel.

This is not only applicable to cPanel but anywhere your DNS is located (it may also be Cloudflare if you use it, but the data and fields are the same and they are called the same everywhere, just the path to them is different).
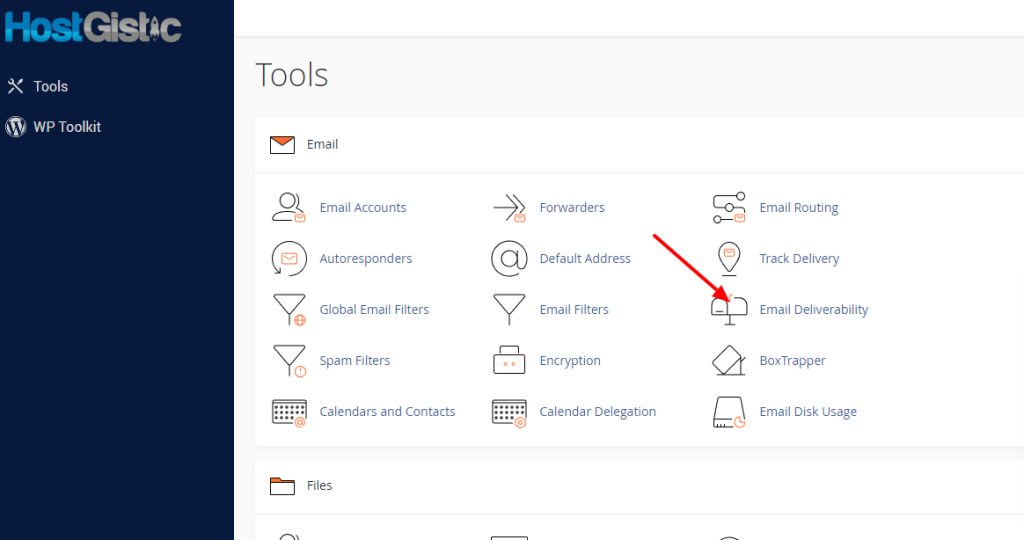
To set up DKIM and SPF correctly, which is necessary for any authorization, log in to cPanel and then go to Email Deliverability and the system will check your DNS.
Note: The system will show that it is not correct and the “repair” button will be disabled if you are using a different DNS, such as Cloudflare. If you are using your hosting’s DNS, this option will be available.
When you click on Repair, the system will do everything by itself, and you have resolved the issue.
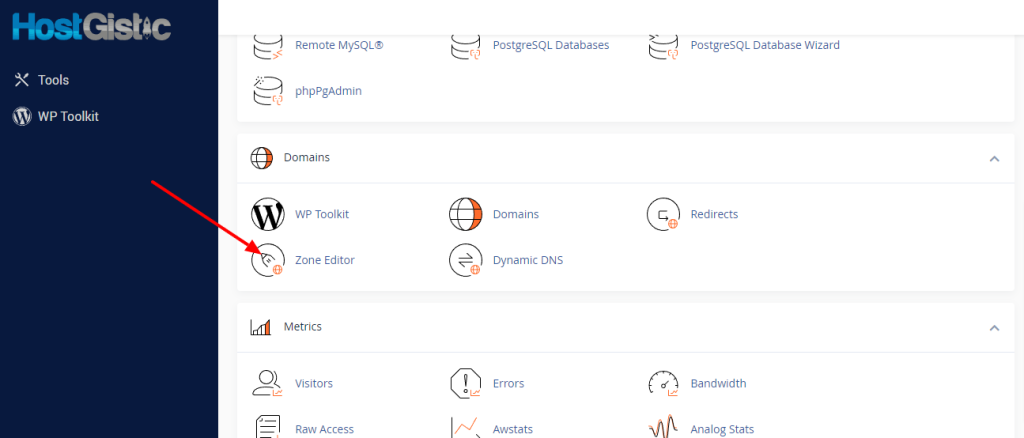
For DMARC you can go to Zone Editor

Then on button Manage. After that it will list you of DNS records we need to add new one DMARC by click on dropdown arrow next to “Add record” and you will see “Add ‘DMARC’ Record”. After click on that option it will show you options but do not change anything and confirm on button “Save record” with that you finished all.


