How to set up SMTP email on WordPress. The process is quite simple, especially if you use a plugin. In this article, we will show you both methods, using a plugin and using a regular PHP function, so you can choose what’s easier for you.
First step: Before connecting in both cases, you need to create an email address in cPanel and save the email address, such as [email protected] and the password for that email address somewhere when creating it.
First, we’ll start with the SMTP plugin for WordPress. There are many plugins that enable this; we have chosen one: https://wordpress.org/plugins/wp-mail-smtp/. Why this one? It is quite simple, even for someone who didn’t know what WordPress was until yesterday, to figure out how to use it and make everything work perfectly.
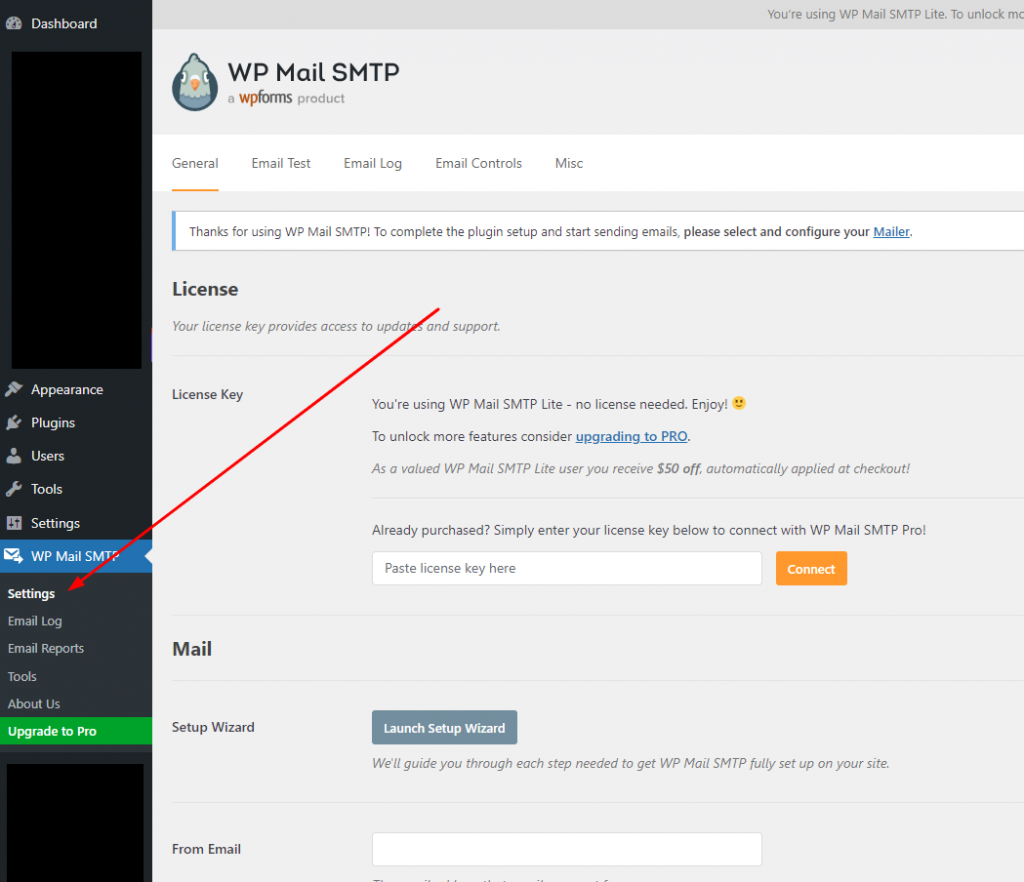
When you install and activate that plugin and go to the plugin settings, you will get a relatively small number of options (which is a good thing), and everything is clear. So let’s go field by field.
The first field is: From Email, as it says, the email you are sending from, you naturally put the email address you created in the first step.
From Name: here, you can put the name of the sender of the email, like Your Comapny Name.
Mailer: As you can see, you have basic offered options and the most popular ones; click on SMTP, the last one, as this connects your email address from your domain and uses our mail server to send emails.
Note: Do not use the first option (php), and for the other options, if you have active services, you can set them up as well.
Settings:
- At the bottom, you have “Other SMTP”. (you can also set up Gmail here and anything else, but this tutorial is for hosting email)
- SMTP host is mail.yourdomain.tld, which means replace it with your domain, but it must start with “mail” followed by a dot, your domain, and a dot with the extension.
- SMTP port 587.
- Encryption TLS
- Authentication: select ON
- SMTP username is your email address you created example@yourdomain
- SMTP password is the password you set when creating the email address example@yourdomain
- Do not type yourdomain.tld, but your information
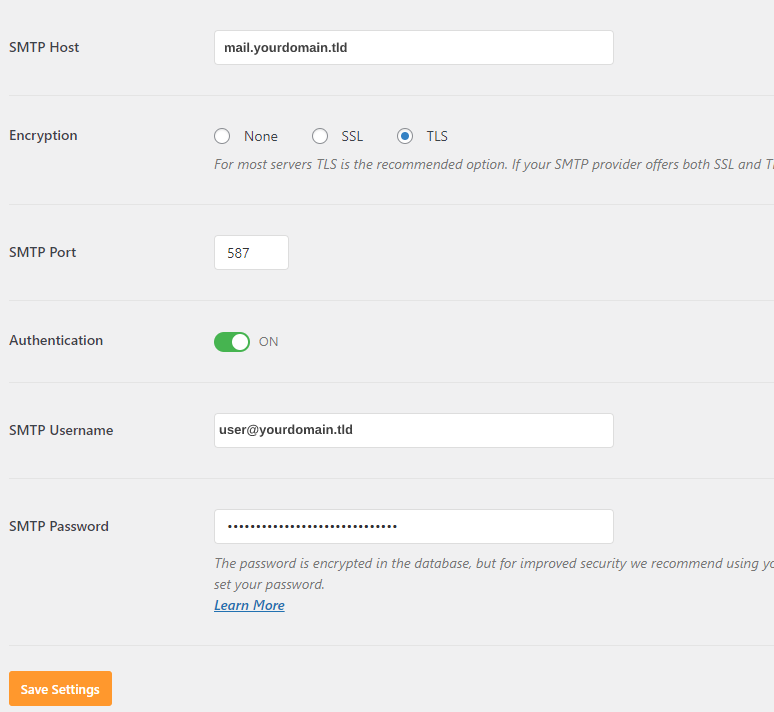
Click on Save, and that’s it. You can test if you receive an email and if everything works as it should, and that’s all.
Congratulations, you have successfully set up SMTP mail for your WordPress site.
Test the correctness:
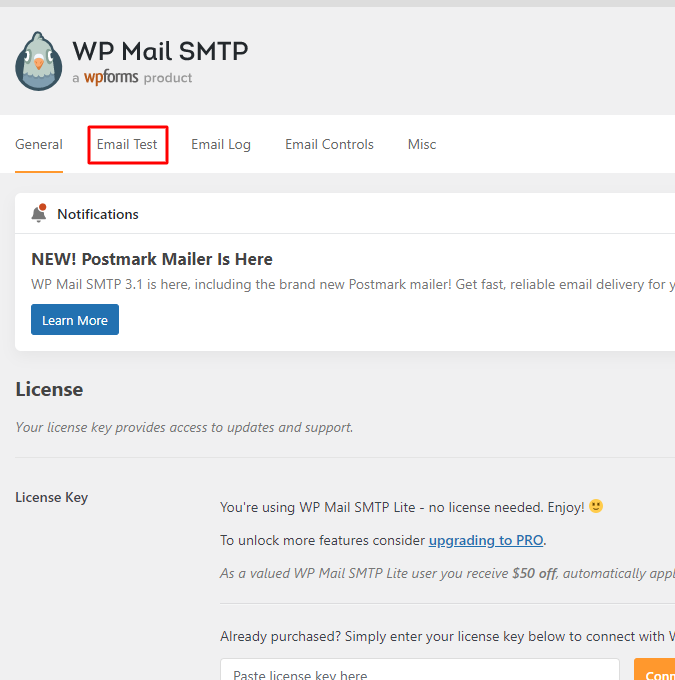
Kada kliknete na test dobicete polje za unos email adrese i kliknete na dugme Send Email kao na slici ispod:
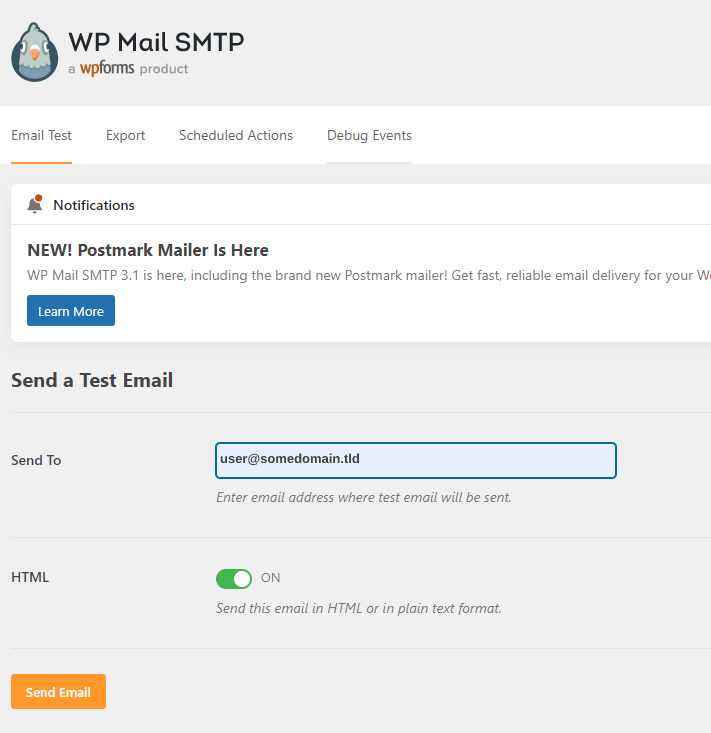
When you click on the test, you will get an email address field and click on the Send Email button as shown below:
Error if it says: Could not authenticate
This means your username (email) or password is incorrect.
Another option that is also possible is to use PHP code to create the same thing.
The first thing you need to do with this option if you don’t have and haven’t activated a child theme is to do it immediately. You can find instructions for creating a child theme on this website.
After that, open the functions.php file in the child theme and copy the following code:
add_action( "phpmailer_init", "wpse8170_phpmailer_init" );
 function wpse8170_phpmailer_init( PHPMailer $phpmailer ) {
 $phpmailer->Host = "mail.yourdomain.tld";
 $phpmailer->Port = 587; // TLS port
 $phpmailer->Username = "[email protected]"; // your email
 $phpmailer->Password = "password"; // password
 $phpmailer->SMTPAuth = true; // required
 $phpmailer->SMTPSecure = "tls"; // required
 $phpmailer->IsSMTP();
 }
Keep in mind that you can also set up SSL for the same purpose, port 465, and SSL. Save the changes to the functions.php file in the child theme, and you’re done.
If you’ve done this in the main theme functions.php file, this change will disappear after updating the theme.
Gmail SMTP
To set up Gmail, you need to use the option where you create a special password for access. Instructions: https://support.google.com/accounts/answer/185833
Gmail SMTP via the app password option.
First, log in to your Gmail account and access the link > https://myaccount.google.com/
A page with our options will open, and we go to Security
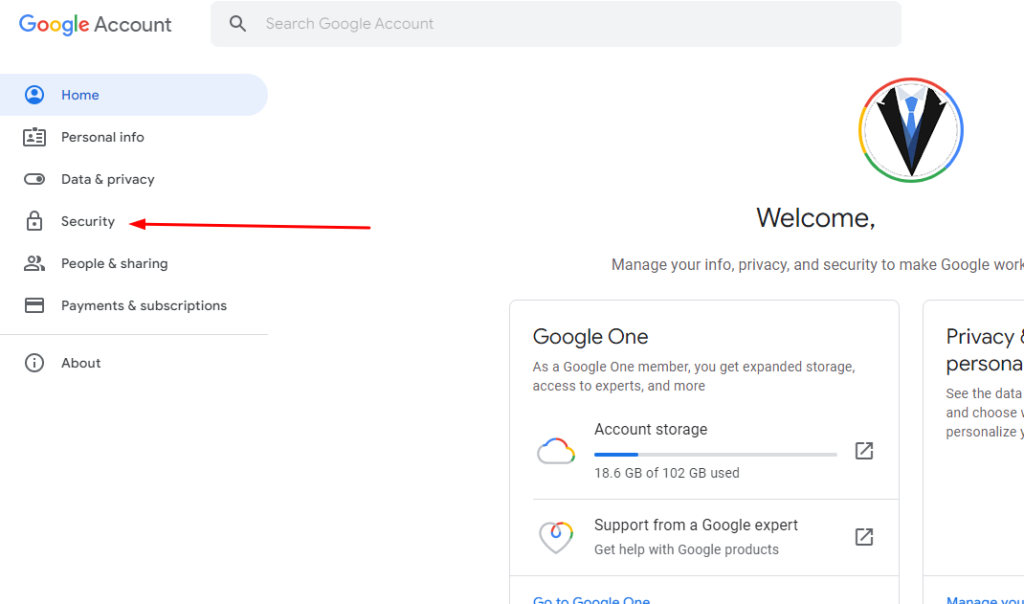
Now that we’ve clicked, we need to find the App Password option and click on it:

Now that we’ve clicked on it, we need to choose exactly what we’re creating the password for. Since we need email from the first drop-down menu, we choose Mail, and from the second, we choose Other since we need it for the website.
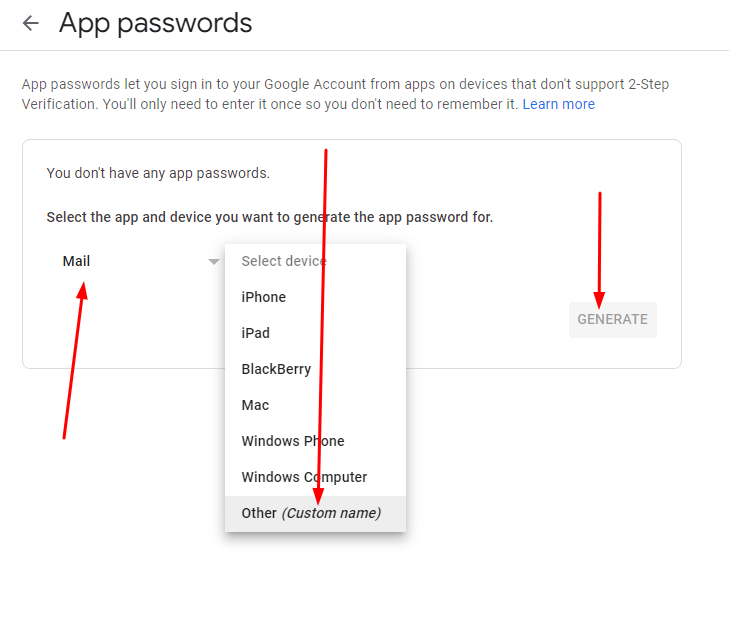
Now that we’ve done that and clicked GENERATE, we get a window like the one below

These characters in orange are our password, and you need to save it and set it up in the SMTP settings
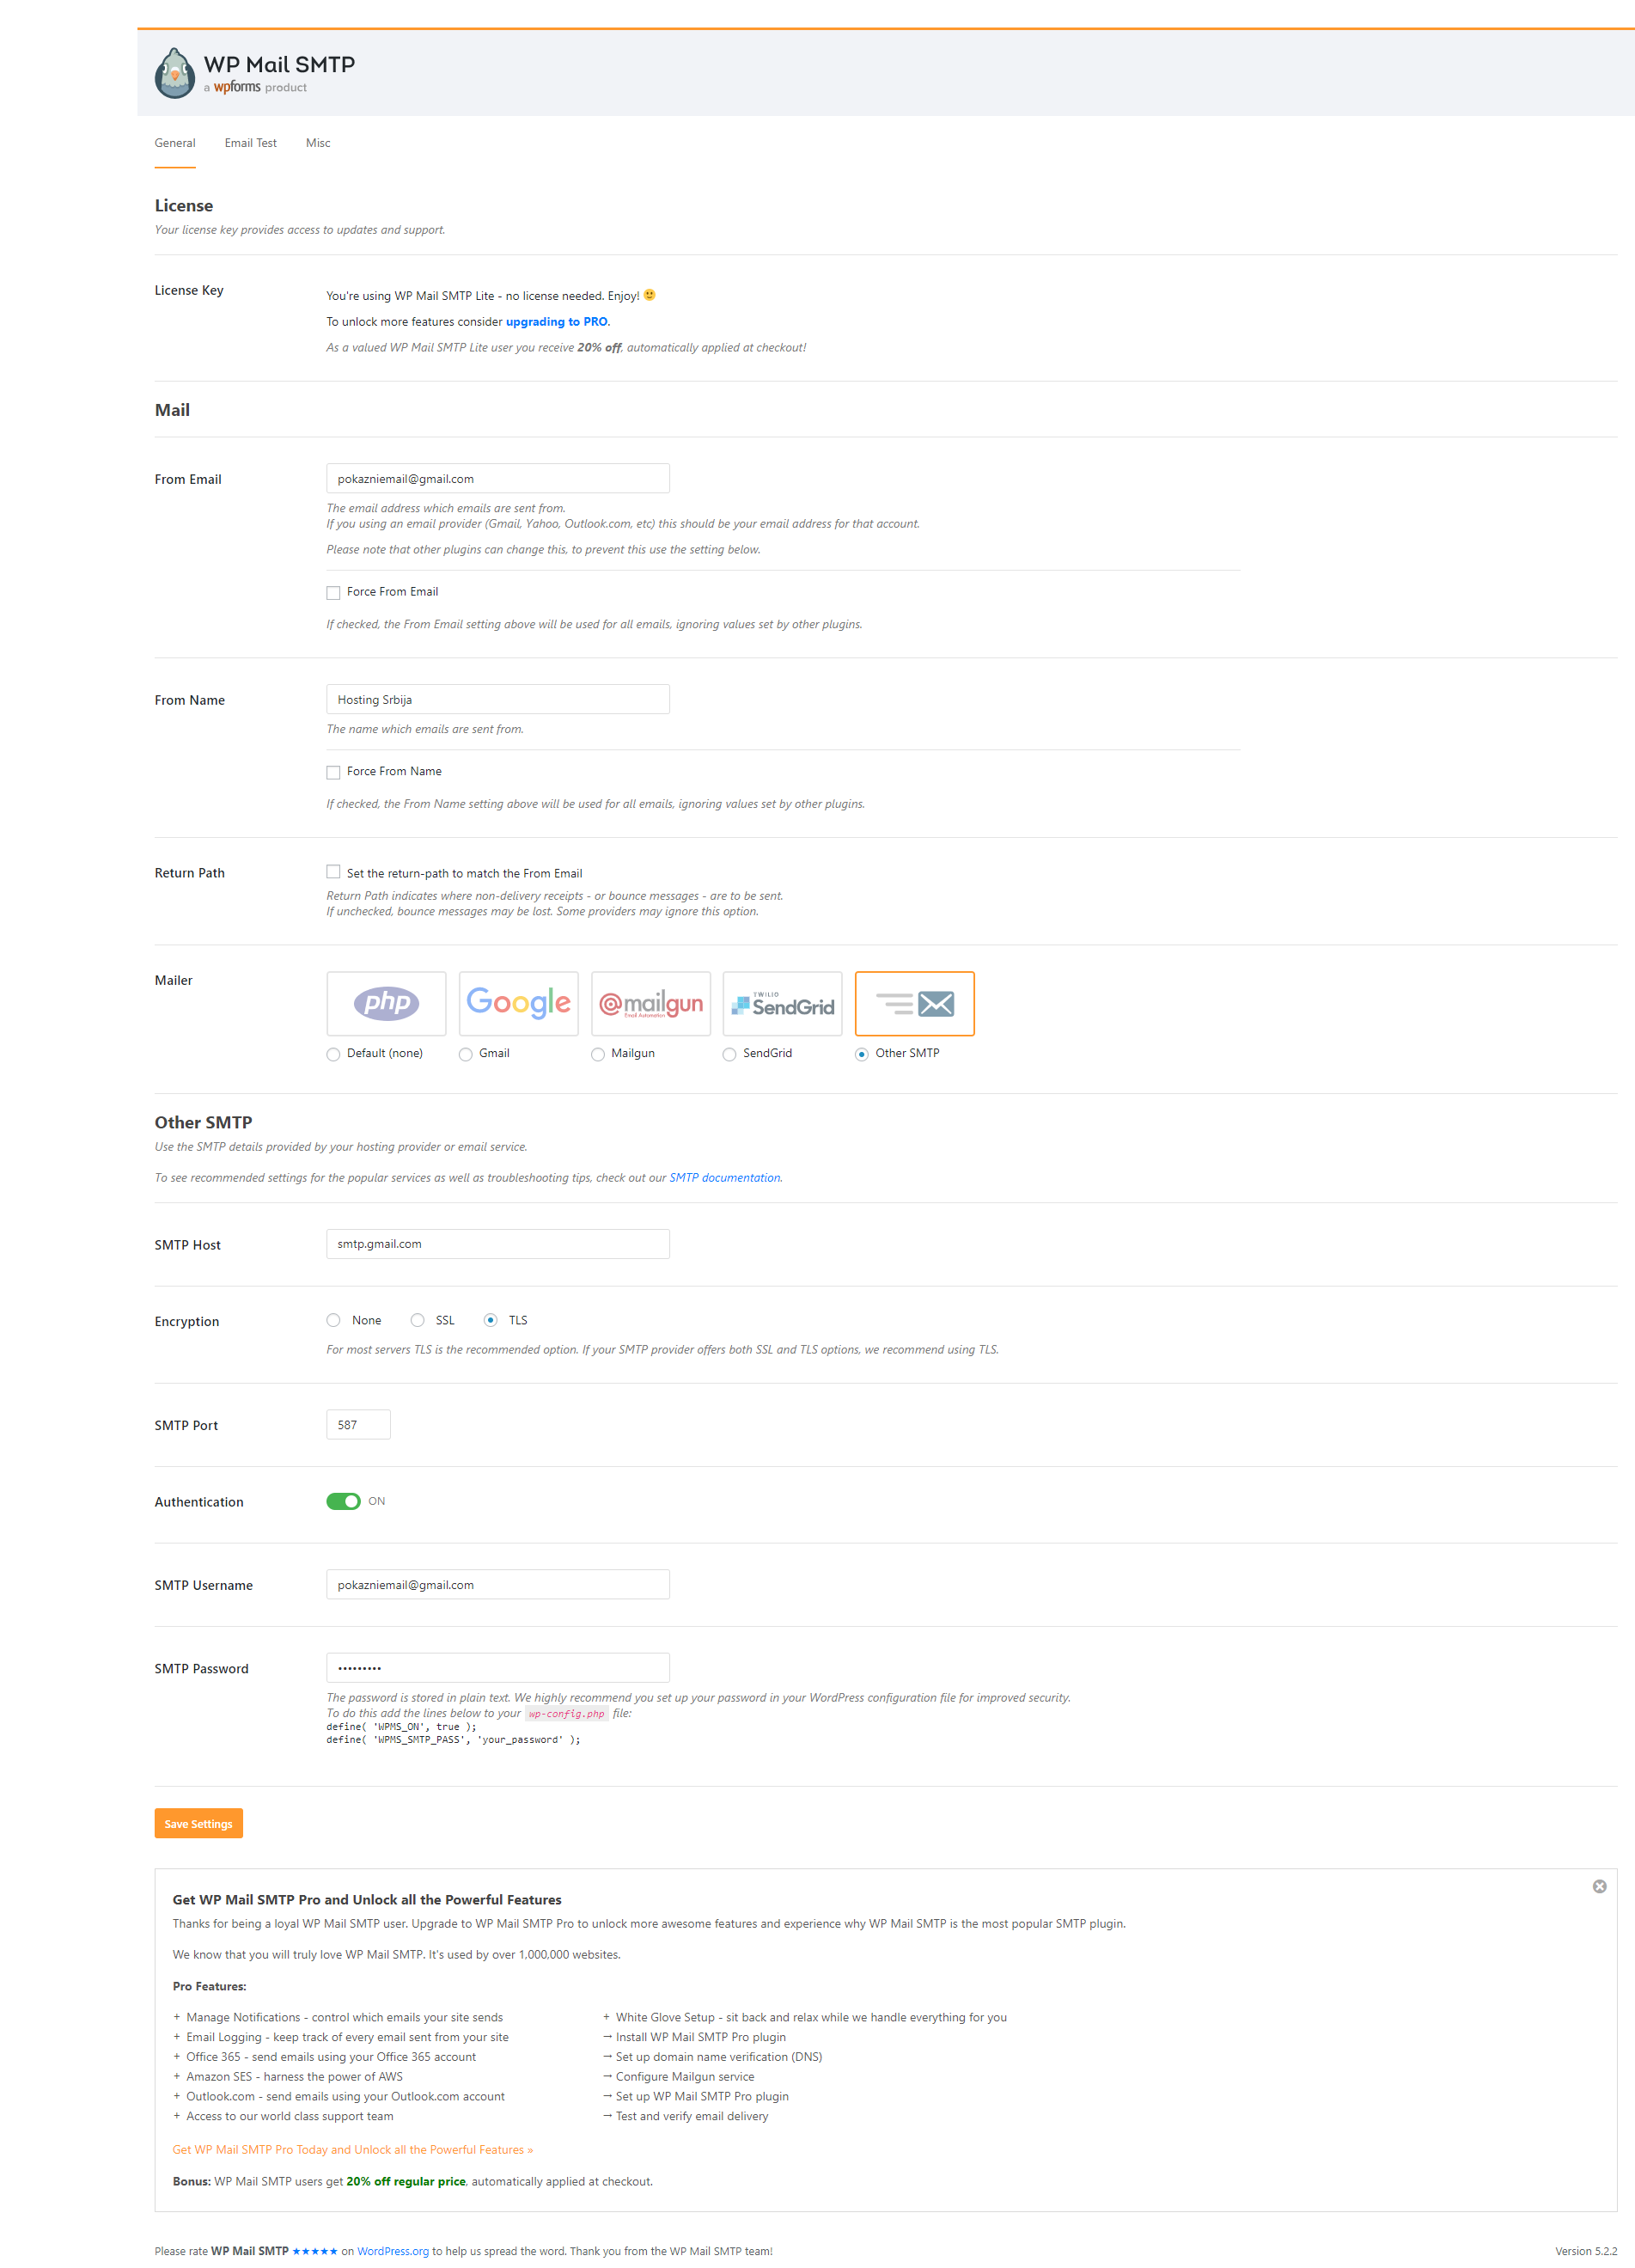
Host: smtp.gmail.com
Port: 587
Encryption: TLS
Username: Email address
Password: Password from the orange square
That’s all there is to it. Now you have a ready email.


